
In my last post I mentioned that my sewing space received an update. Previously I had carpeting because when we built this house carpeting or vinyl flooring were the only choices. I opted for the basic carpeting because I knew I would ultimately change the flooring. The new flooring is a nice plank laminate and I am very happy with it. With this change, I took the opportunity to do some major revision of storage space since everything had to be removed from the room.
My goal was to get as many items as possible into closed storage (hidden), or if not hidden (such as books), much more efficient and pleasing to view. I have a large space to work with; 2 adjoining rooms with a large opening between them. One room is 15X15, which houses the machines and pressing area. The second room is 11X13, which is the cutting area, desk and fabric storage. The smaller room also has a closet, which houses more fabric and a variety of stuff like interfacing, linings, other creative crafting items.
The initial furnishings were a mish-mash of re-purposed items from previous houses. I only kept a few of those items to put back into the room: The sewing machine tables, which are solid wood and came from a sewing machine table manufacturer many years ago. The desk, which was built by a closet company who has done a lot of work in my house. The fabric storage, which is 3 towers of 12 X 12 storage cubes with fabric bins. I did have a cutting table that was part of the sewing machine furniture set, but I wanted storage the table did not provide. I was able to sell it to a fellow ASG member.
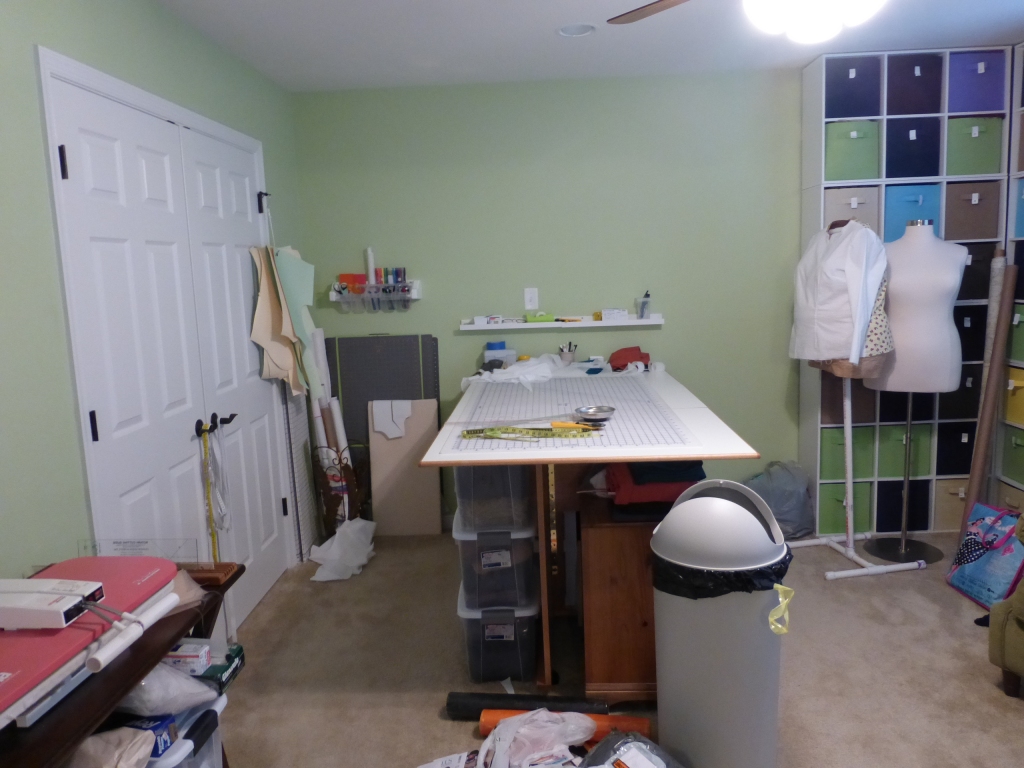
Here is a very messy BEFORE view of the “cutting” room
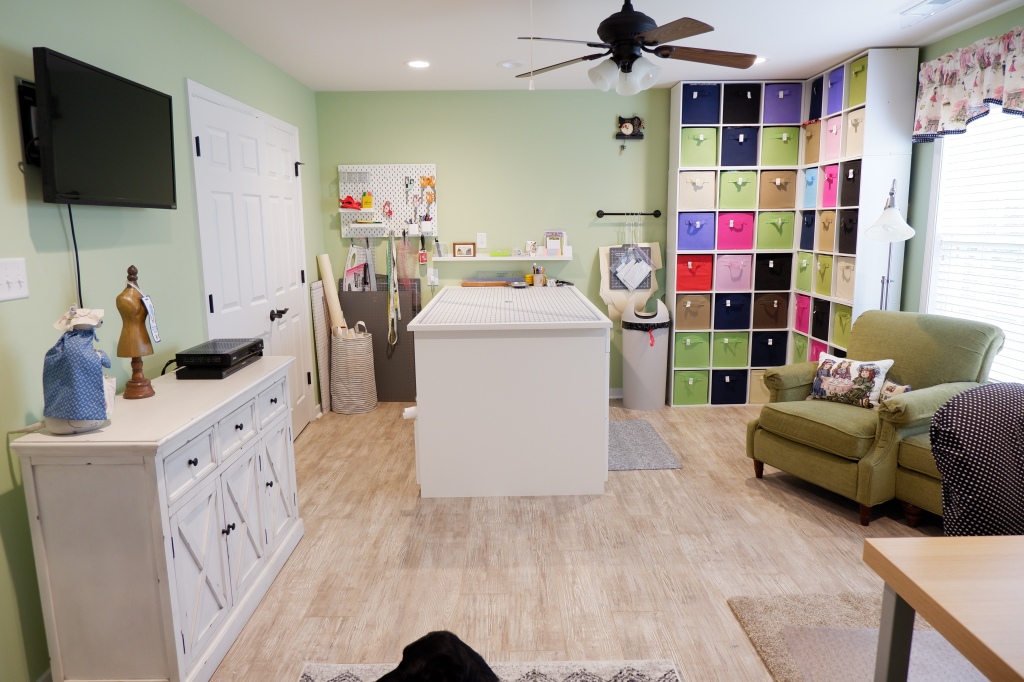
Standing in the doorway between the rooms, here is an AFTER view of the “cutting” room. The table is the same size I had previously, but now it has drawers and shelving underneath, accessible from both sides. (My furry sewing buddy is photo-bombing at the bottom of the picture).
The cabinet on the left wall came from Pier1 (boo hoo that they are going out of business). Drawers hold scissors and some generic tools; the lower portion holds quilt and purse kits, along with a bin of table runner, wall hanging and purse patterns.

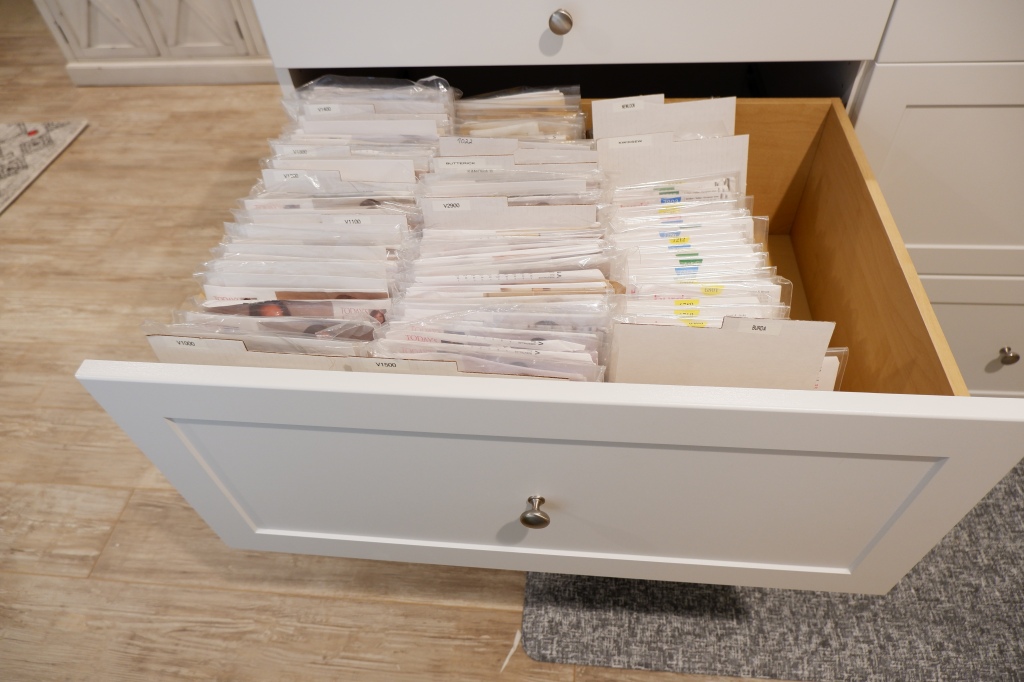
Pattern storage: I have tried a variety of methods. I previously stored patterns by type: Tops, Pants, Coordinates, Dresses and so on. And then by brand within each type. That became unwieldy for me. And maybe it was just because the way they were stored (in cardboard boxes) was unsightly and hard to dig through.
I do have information about all my envelope patterns in an app on my IPad and keep it up to date. So if I am searching for a particular number I can see if I have it; or I can search by Tops and see which patterns I have (not that this keeps me from buying duplicates…).
The wall with my window and desk. I covered the desk chair with a black and white polka dot home dec fabric. The back cover just slips on and the seat cover has a string like an ironing board cover has to hold it on. The shelves above the desk hold fashion books, binders with my fabric cards, separated by type (wool, silk, cotton, linen, etc). The tags on the fabric pins have numbers on them, and there is a card for every fabric in the notebooks with a swatch and bin number.

Moving on to the “sewing/pressing” room.
A messy BEFORE picture of this room – there are no curtains up so that means it was taken shortly after we moved into this house.

The AFTER picture below is taken from the doorway between the two rooms.

Machine tables are in a U-shape. My serger is on a different table. All of these tables are hooked together and can be configured in a couple of different ways. The pressing table at the back of this picture was built and installed by the closet guy. It has drawers below at the ends, and a center opening below. I have garment fabric scraps in a tall wicker basket in that opening.
The two shelving units on either side hold my project boxes (UFOs, garment and pattern matched up as a project, etc). I try to pull something from that shelf for every other project, and evaluate whether I want to make that item. Sometimes a fabric/pattern match no longer thrills me. So both might go out of project boxes and back to pattern and fabric storage separately. Or I may select a different pattern for that fabric – depends on what mood I am in. Like most of us, I have many more ideas that come up and push other ideas to the back.
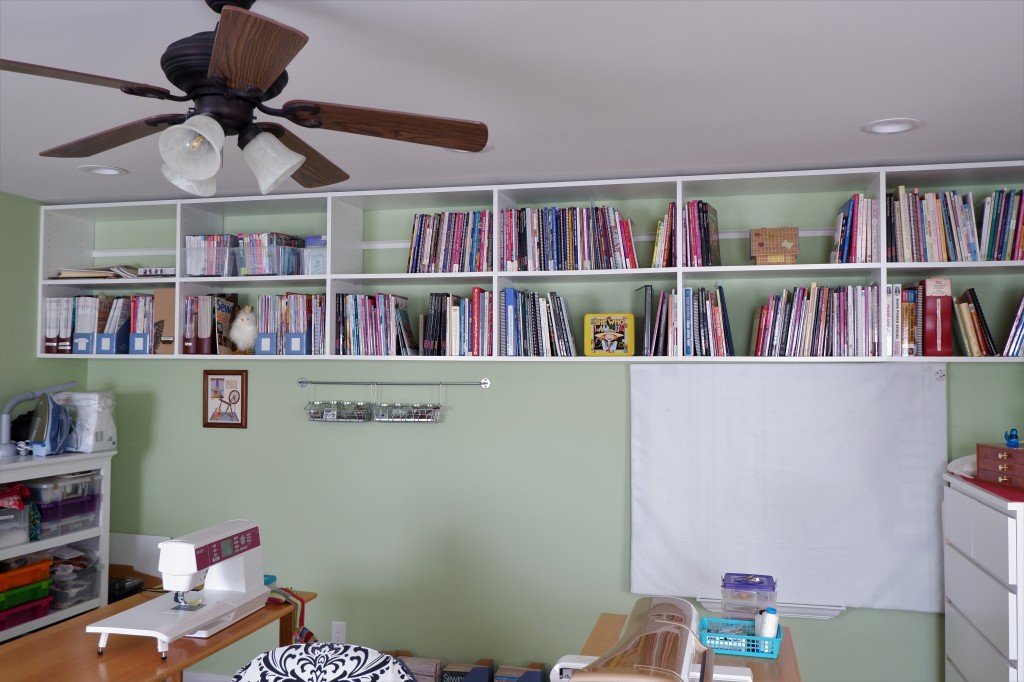
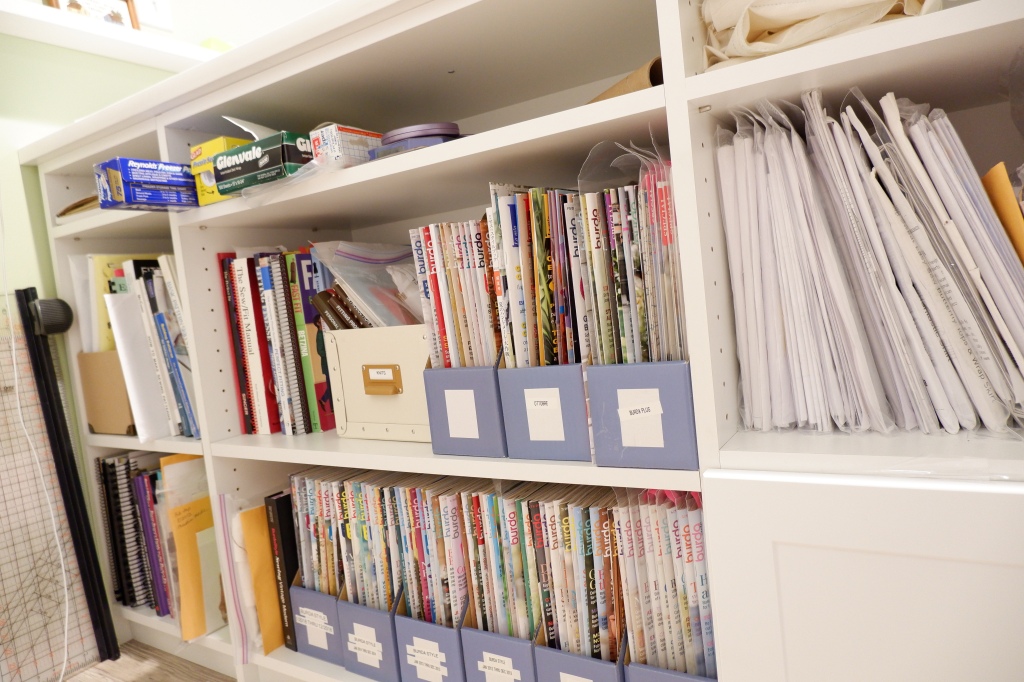
This is the same view as the messy picture above. Those wood bookshelves went to a new home via Habitat for Humanity, and many books went to the library. I have a bunch of quilting magazines and some books in the garage for our ASG chapter garage sale – hopefully next spring. These are the books and magazines I kept and they are organized by topic and off the floor. I do have to get on a stepstool to reach the top shelf, but that is not often.
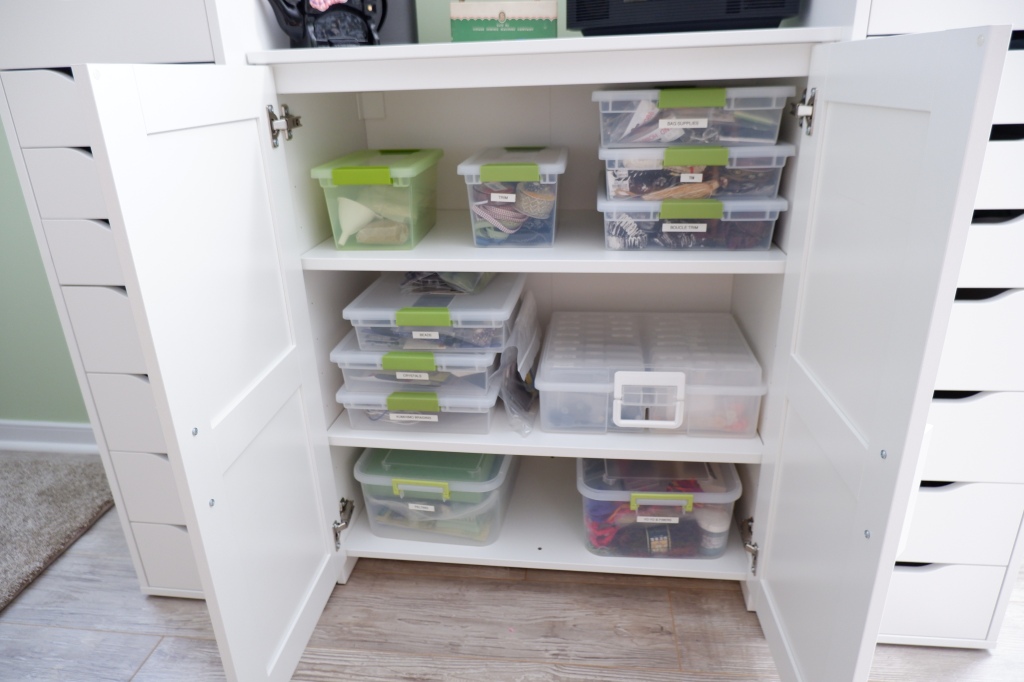
The big white square is a flannel covered foam board – which is my design ‘wall’. It is sitting on a cool little picture shelf from IKEA. The dresser to the right in the above picture also came from IKEA. I wanted to have all of my machine embroidery thread, stabilizers, hoops, design cards in 1 place. They were spread around the room and even some stored in a separate room. I couldn’t even remember what I had, or where it was.
This view is the wall opposite the wall in the previous picture.

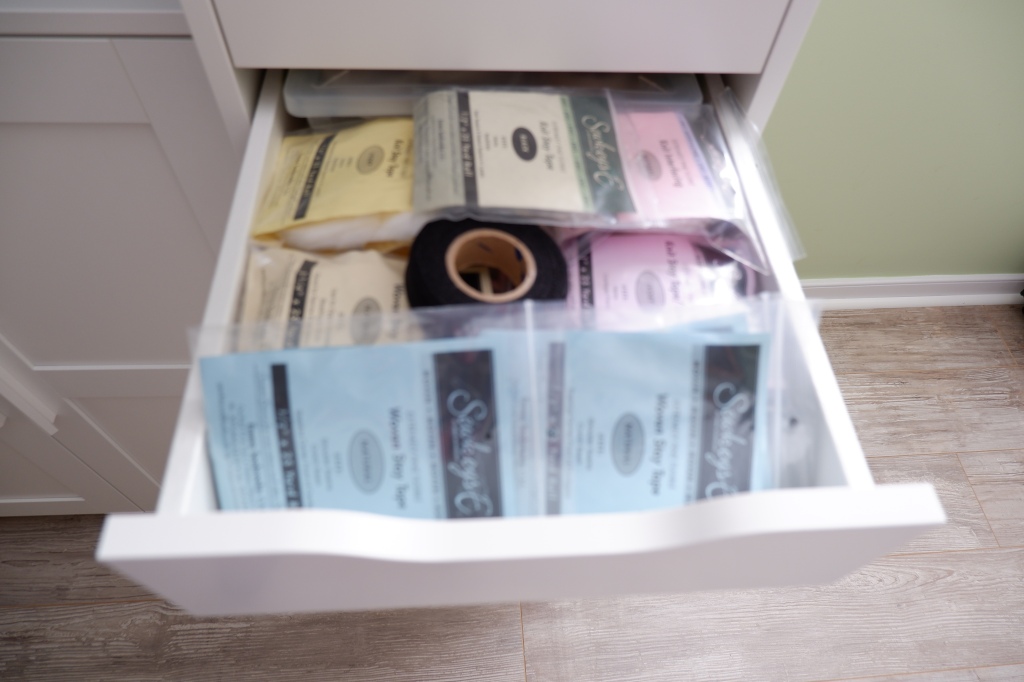
The table on the left holds my sergers. This table was part of the U of machines before, but I wanted the long table (which is just out of this picture to the right) as part of the U. I covered this chair in the same way as the chair at the desk (they are both identical – ugly blue fabric). The cabinets between the windows all came from IKEA. Yes, we had a lot of fun there, and even more fun putting it all together. In the two sets of drawers I have small notions – elastic, interfacing and stabilizer tapes, ribbon, snaps, serger thread – all the small stuff that I used to have in little bins on top of the old bookshelves. The middle cabinet has 3 shelves and holds a container of buttons (sorted by color), and bins of trims, stuff for jewelry making, crystals, felting supplies,etc. All bins are labeled.
If you made it to the end, thanks for sticking with me. I love my new space. This is actually the 5th house I’ve lived in, and I have been lucky to have some sort of dedicated space in each one. But this one is really the best! I have been playing in this space for about 4 months now and it is truly my happy place.
